News
-
Milk-Poached Halibut Flavored with Rosemary and Kaffir Lime Leaves

Cooking time: 12-20 minutes
Serves: 4Recipe based on work by Dave Arnold and Nils Norén.
Ingredients:
4 portions of halibut (6 oz / 170g – 1½ inch / 40mm thick)
1/2 C / 120ml milk
3 sprigs rosemary
4 Kaffir Lime leaves, thinly sliced
Kosher salt, to tasteStep One:
Set the temperature on your Sous Vide Professional™ to 51.7°C / 125°F with rear pump flow switch closed and front flow switch set to full open.
Step Two:
Season the halibut with salt. Place the halibut in a bag; add milk, rosemary and lime leaves and vacuum seal. Make sure that the fish is not overlapping in the bag.Step Three:
Drop bag into the 51.7°C/125°F water bath and make sure that it is completely submerged. If necessary, place a small weight on the bag to weigh down the fish. After 11 minutes, remove the bag from the water and feel the fish for doneness. If the fish is not done, return the bag back to the water bath. Check every 2 minutes until the fish has reached desired doneness.Step Four:
Remove bag, take halibut out of the bag and serve.Step Five:
Gently remove halibut from vacuum bag. If a sear is desired, gently dry off the portion with paper or kitchen towel. Season as desired and sear in a hot pan with olive oil or butter. The halibut may also be grilled, if desired.Side Note:
A 20% salt solution is effective in inhibiting the secretion of albumen and gives the halibut a pure white color when cooked. The brine will eliminate the need for additional salt in the recipe when brined for 20 minutes. Brine must be applied when ice cold, hence the crushed ice in the recipe. Rinse the halibut prior to vacuum sealing.Brine:
1 1/2 C / 330g Kosher Salt
1 Qt /.95L water
2 lbs /.9kg ice, crushed -
Sous Vide Diver Scallops

Cooking Time: 12-20 minutes
Serves: 3-4Ingredients
8 Large Diver Scallops – dry packed, 10/30 U/8-U/10
2T Shallots, chopped
3-4 Sprigs of Fresh Thyme
Zest of ½ Lemon
Kosher Salt and Fresh Cracked Black Pepper, to taste
Grape Seed Oil, for searingStep One
Set the Sous Vide Professional™ to the desired temperature, with rear pump flow switch closed and front flow switch set to full open. For diver scallops, 125°F / 52°C is found to be the best temperature.
Step Two
Season scallops with salt and pepper. In a small vacuum bag, place seasoned scallops along with thyme, lemon zest and chopped shallot.Step Three:
Seal scallops to desired vacuum. For delicate items like shellfish, the best vacuum percentage is 80-90%. This will ensure the scallop is not compressed under vacuum, compromising the integrity of the delicate muscle fibers.Step Four:
Once target temperature is reached, place scallops in circulating water bath.Step Five:
Cook scallops to desired doneness for 12-20 minutes.Step Six:
Gently remove scallops from vacuum bag. Dry the scallops with paper towel. Season scallops with salt and pepper. Sear in a very hot pan with grape seed oil until golden crust forms on both ends.Optional:
For a touch of smoke, lightly smoke the finished scallop with applewood smoke, using The Smoking Gun™ by PolyScience. -
Sous Vide Beef Tenderloin

Cooking Time: 45-60 minutes
Ingredients:
1 Beef Tenderloin or Chateaubriand 2-6 lbs
2-4 Sprigs of Fresh Thyme
Black Truffle Oil, to taste
Kosher Salt and Coarse Ground Black Pepper, to taste
Step 1:
Set the rear pump flow switch to fully closed and the front flow switch to the maximum flow to ensure proper circulation. Set the temperature of the Sous Vide Professional™ to desired temperature.Beef Temperature Guidelines
Rare: 120°F / 49°C
Medium Rare: 134°F / 56.5°C
Medium: 140°F / 60°C
Medium Well: 150°F / 65.5°C
Well Done: 160°F / 71°CFor more information on food safety, please click here.
Step 2:
Season the beef with kosher salt and black pepper.
Step 3:
Roll edges of vacuum pouch back an inch or two to prevent cross-contamination. Place beef into the bag, along with sprig of thyme and black truffle olive oil.Do NOT use dairy products, such as butter, in cook times exceeding 4 hours.

Step 4:
Vacuum seal beef to 95% vacuum or greater. Place in circulating water bath and cook for 60-90 minutes, or until target core temperature is reached.
Step 5:
Remove cooked beef from bath and carefully open pouch. Remove beef, gently dry on paper towel to absorb excess moisture and sear evenly in hot pan or grill.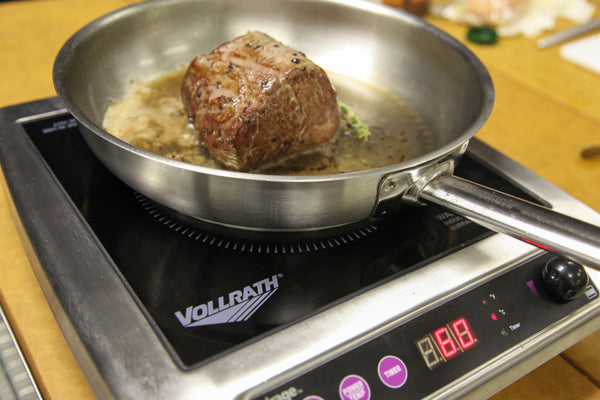
Step 6:
Remove seared beef from pan, rest 60 seconds and slice. Sous vide beef does not require but a few moments to rest. -
Brined Pork Loin

Serves: 4-6
Prep time: 18 hours
Cook time: 3 hoursIngredients:
Boneless Pork Loin
Peels of One Lemon and One Orange
Brine (according to recipe below)Brine:
5 tablespoons pickling spice
1 tablespoon whole black peppercorns
1/2 cup cane sugar
1 tablespoon honey
2 cup kosher salt
4 cups water
1 bunch fresh thyme leavesFor more information on food safety, please click here.
Preparation: Brined Pork Loin
Step 1:
Combine all brine ingredients in a saucepan, bring to a boil.
Cool completely, refrigerate until ready for use.
Place pork loin in brine and let sit, refrigerated, 12-18 hours.*
*The longer the pork sits in the brine, the stronger the salt flavor will be, after cooking.Step 2:
Rinse brine from pork loin and vacuum seal with enough olive oil to coat liberally.Step 3:
Set the rear pump flow switch of the Sous Vide Professional™ to fully closed. Set the front flow switch to the maximum flow. Set the temperature of the Sous Vide Professional™ to 60°C / 140°F.Step 4:
Once target temperature is reached, place vacuum sealed pork loin in circulating water bath.Step 5:
Cook sous vide for about 2-3 hours.Step 6:
Drain all liquids from bag, dry surface of pork loin with clean kitchen towel. In a hot, large sauté or roasting pan, brown entire surface of pork loin. Season with salt and pepper to taste. -
New Sous Vide Perspectives

Although I’ve been cooking Sous Vide for over 10 years, I jumped at the chance to attend a CREA-sponsored class led by Bruno Goussault, the Chief Scientist at Cuisine Solutions, Inc. After all, how often do you get a chance to learn directly from the man often referred to as the “Father of Sous Vide Cooking”?
In my case, the CREA (Culinary Research & Education Academy www.lecrea.com ) hosted by Kendall College in November ranks right up there with Bruno’s workshop I attended about 8 years ago alongside Wylie Dufresne and his team from wd~50 and Jean-Georges Vongerichten’s staff from his eponymous award-winning restaurant, Jean-Georges. I hope you get the idea that this was a big deal.
Bruno provided a wide array of thought provoking ideas. I’d like to share a couple of those takeaways in hopes that they will help and inspire you to further explore Sous Vide cooking and its many benefits.
To get started, it’s important to know that Bruno isn’t the kind of guy that let’s you take anything for granted. Instead, he challenges each student to think through all of the culinary ideas they’ve been carrying around and forces you to firm up those that haven’t fully gelled. No detail or idea is apparently too small or fundamental in his quest for culinary perfection.
For example, Bruno’s notion that we cook to “modify the functional properties of food” may seem incredibly obvious, but how many of us have actually thought it through? As we moved through the three-day program, that definition provided direction when evaluating how best to prepare a wide variety of ingredients that are seldom uniform.
We learned, for example, that game can be relatively hard to cook compared to domestic animals because of its elevated lactic acid levels created by physical activity. Consequently, Bruno suggests that we always separate the rabbits we want to eat from ones of the opposite sex at least one week prior to slaughter to eliminate the physical activity they are known to engage in. The more sedate rabbits will taste better than those that were active.
Similarly, not all beef is the same. The cooking times of American versus European beef is a good case-in-point. More specifically, European beef often requires longer cooking times because it is usually slaughtered older and because the US animals have been subjected to practices that increase growth rates and fat content.
Focusing on fish, Bruno suggests that the product should always be salted before cooking to block the unattractive release of albumin through osmotic pressure.
When Bruno prepares vegetables, he always uses an extended vacuum hold to draw air from inside their dense structures. He then adds some fat to absorb aromatics and flavor and cooks at 83C, safely below the 85C where he claims pectin becomes active. In the class we cooked all vegetables for 3 hours. He chills vegetables then re-heats them, even if serving soon after cooking, to retain the aromatic qualities.
Regardless of whether he’s cooking meat, fish or vegetables, Bruno chills the products by first subjecting them to ambient temperatures for 5 minutes, then to an ambient bath for 5 minutes, and finally to an ice bath. For meat and fish he theorizes the process allows re-absorption of fats and gelatin that would not occur if you go directly to an ice bath. In the case of vegetables, he believes that when you open a hot vacuum sealed bag you allow the “perfume” of the product to escape. By cooling the product and reheating to a moderate serving temperature such as 56C, you alternatively retain the aromatics.
Bruno notes that adding ascorbic acid as an antioxidant can help vegetables, especially artichokes, retain their color. Adding lemon will release ascorbic acid, but he warns against squeezing to avoid releasing citric acid. He suggests adding fructose or balsamic to fix the color of beets and other vegetables.
In all of our cooking we used probes to determine actual core temperatures. I personally have a love/hate relationship with probing, but it is the best method to truly understand core temperature. I was pleased that when I compared our PolyScience Sous Vide Toolbox iPhone/iPad application, our predicted temperatures agreed with the probes. Unfortunately you can’t tell that to a health department inspector.
Bruno typically prefers what he calls “Step” Sous Vide Cooking. This is different from the way I have utilized the Sous Vide technique in which I generally have my bath within 1 degree of the desired core temperature. Instead, Bruno will start the cooking process in an 83C bath for a short period (typically 3-5 minutes) and then move the food to a bath set closer to desired core temperature.
I see some advantages to this “Step” approach. First, you kill surface bacteria. Additionally you create some textural variations that can make some foods such as cod or sea bass more varied and interesting.
The list goes on and will be the basis of future postings.
If you have the opportunity to attend one of Bruno’s classes you will leave with a much better understanding of how to cook Sous Vide with great results and safety.
Philip Preston
President
PolyScience


